


Seat Leon III Bezpieczniki Secrets: Don’t Blow a Fuse Before You See This! - An Introduction
So, you’ve got a sleek, sporty Seat Leon III, a car known for its sharp handling, stylish design, and… well, sometimes its quirky electrical gremlins. Whether you’re a seasoned car enthusiast or a casual driver, chances are you’ve encountered a problem that required a bit of detective work. Perhaps your turn signals decided to take a vacation, your infotainment system went silent, or your central locking system decided to throw a party without your permission. And in the world of automotive electrical systems, the culprit is often, and frustratingly, a blown fuse.
This is where understanding your Seat Leon III’s Bezpieczniki becomes crucial. “Bezpieczniki” is the Polish word for “fuses,” and in this guide, we’ll delve deep into the secrets of your car’s fuse boxes. We’re not just talking about a basic “replace the blown fuse” guide; we’re talking about understanding why fuses blow, how to diagnose the underlying issue, and how to navigate the often-confusing landscape of fuse locations, amperage ratings, and potential problems lurking within your Leon III.
Why is understanding your car’s fuses so important?
Imagine your car as a complex symphony orchestra. Each electrical component – the headlights, the radio, the power windows – is a musician, and the fuses are the conductors. They protect these delicate components from being overloaded with electricity, preventing them from burning out or, even worse, causing a fire. Think of them as the first line of defense against electrical chaos.
A blown fuse can be a minor inconvenience, but it can also be a symptom of a larger, more serious problem. Ignoring a blown fuse, or simply replacing it without understanding the root cause, can lead to:
- Recurring problems: The same fuse will continue to blow if the underlying issue isn’t addressed.
- Damage to components: Overloading a circuit can fry expensive parts like your ECU (Engine Control Unit) or infotainment system.
- Safety hazards: A blown fuse for your headlights, brake lights, or indicators can compromise your safety on the road.
- Costly repairs: Diagnosing and fixing electrical problems can be expensive, especially if the damage is extensive.
Background Context: The Modern Car and its Electrical Complexity
Modern cars, including the Seat Leon III, are incredibly complex machines, heavily reliant on electrical systems. They’re packed with sensors, computers, and electronic gadgets that control everything from engine performance to driver assistance features. This increased reliance on electricity means a significant increase in the number of fuses protecting these systems.
Understanding the fuse layout, amperage ratings, and the circuits they protect is therefore essential for anyone who owns a modern car. It’s no longer just about knowing how to change a lightbulb; it’s about becoming a detective, armed with knowledge and the right tools, to troubleshoot and maintain your vehicle’s electrical health.
What You’ll Learn in This Guide
This guide will provide you with a comprehensive understanding of your Seat Leon III’s Bezpieczniki. We will cover:
- Locating the Fuse Boxes: Where are they hidden, and how to access them?
- Decoding the Fuse Layout: Understanding the diagrams, the symbols, and what each fuse controls.
- Identifying the Amperage Ratings: Knowing which fuse is the right one for the job.
- Troubleshooting Common Fuse-Related Problems: Diagnosing the cause of a blown fuse.
- Preventative Maintenance Tips: How to keep your electrical system healthy and avoid future problems.
- Essential Tools and Resources: What you need to tackle fuse-related issues safely and effectively.
So, buckle up! We’re about to embark on a journey into the electrical heart of your Seat Leon III. By the end of this guide, you’ll be equipped with the knowledge and confidence to handle those pesky fuse problems and keep your Leon III running smoothly, safely, and without blowing a fuse (or your cool). Let’s get started!
Seat Leon III Bezpieczniki Secrets: Don’t Blow a Fuse Before You See This! - A Deep Dive
This guide delves into the often-overlooked but critically important topic of fuses in the Seat Leon III (2012-2020). Understanding your car’s fuse box, the function of each fuse, and how to troubleshoot electrical issues is essential for maintaining your vehicle’s functionality and safety. This guide will equip you with the knowledge to avoid costly repairs and potential hazards.
Key Concepts:
- Fuses: The Electrical Guardians: Fuses are designed to protect your car’s electrical circuits from overcurrents. Think of them as sacrificial links. If too much electrical current flows through a circuit (due to a short circuit, a faulty component, or an overload), the fuse blows, breaking the circuit and preventing damage to the wiring, connected devices, and, ultimately, the car itself.
- Circuits and Components: Your car’s electrical system is a complex network of circuits, each designed to power a specific component or group of components (e.g., headlights, radio, power windows, etc.). Each circuit is protected by one or more fuses.
- Fuse Types & Ratings: Fuses come in different sizes and amperage ratings (measured in Amperes - A). The amperage rating indicates the maximum current the fuse can handle before blowing. Using a fuse with a higher amperage rating than specified can be extremely dangerous, potentially leading to fire or component damage. Using a fuse with a lower rating might lead to frequent blowing.
- Fuse Box Locations: The Seat Leon III typically has multiple fuse boxes:
- Main Fuse Box (Engine Compartment): Usually located near the battery. This box houses the fuses for high-power components like the starter, ABS system, and engine management.
- Interior Fuse Box (Dashboard/Driver’s Side): Often located on the driver’s side, behind a panel near the dashboard or under the steering wheel. This box contains fuses for interior lights, infotainment, power windows, and other convenience features.
- Other Fuse Boxes (Depending on Configuration): Some models may have additional fuse boxes in the trunk or under the rear seats for specific features.
- Fuse Color Coding: Fuses are color-coded to indicate their amperage rating:
- Brown: 5A
- Red: 10A
- Blue: 15A
- Yellow: 20A
- White/Clear: 25A
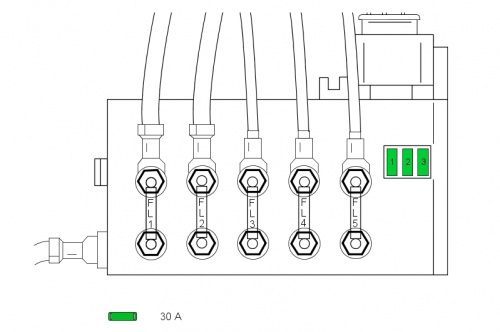
- Green: 30A
- Purple: 40A
- Fuse Puller: A small plastic tool designed to safely remove and install fuses. Often included in the fuse box cover or in your car’s tool kit.
- Multimeter: A versatile tool (not essential, but highly recommended) for diagnosing electrical problems. It can measure voltage, current (with the right setup), and continuity, helping you pinpoint the source of a blown fuse.
Processes & Procedures:
Locating the Fuse Boxes:
- Consult your owner’s manual. It will provide a detailed diagram showing the location of each fuse box in your Seat Leon III.
- Look for diagrams printed on the fuse box covers themselves. These diagrams usually indicate which fuse protects which circuit.
- Example: The owner’s manual might show the main fuse box in the engine compartment, located near the battery. It will then detail which fuse corresponds to the headlights, the starter motor, and other engine-related components. The interior fuse box diagram might indicate which fuse controls the radio, the power windows, and the interior lights.
Identifying a Blown Fuse:
- Visual Inspection: The easiest way is to visually inspect the fuse. Look for a broken wire or a melted element within the fuse body. You can usually see this without removing the fuse.
- Using a Multimeter (Continuity Test):
- Set your multimeter to the continuity setting (often depicted by a diode symbol or a speaker).
- Remove the fuse from the fuse box.
- Place the multimeter probes on the two metal contacts of the fuse.
- If the fuse is good, the multimeter will beep or show a near-zero resistance reading.
- If the fuse is blown, the multimeter will not beep or show an “OL” (Overload) or infinite resistance reading.
Replacing a Blown Fuse:
- Safety First: Turn off the ignition and all electrical consumers (lights, radio, etc.) before working on the fuse box.
- Locate the Correct Fuse: Refer to the fuse box diagram to identify the fuse corresponding to the malfunctioning component.
- Remove the Blown Fuse: Use the fuse puller (if available) to gently pull the blown fuse straight out of its slot. Avoid using metal tools (like screwdrivers) to prevent accidental short circuits.
- Inspect the Fuse Slot: Ensure the contacts in the fuse slot are clean and free of corrosion.
- Install the New Fuse: Insert a new fuse with the exact same amperage rating as the original. Make sure the fuse is seated properly.
- Test the Component: Turn on the previously malfunctioning component to check if it now works.
- Troubleshooting (If the New Fuse Blows Immediately): If the new fuse blows immediately, there’s an underlying electrical problem (a short circuit or a faulty component). Do not keep replacing fuses with a higher amperage rating! You need to diagnose the problem.
Troubleshooting Electrical Problems:
- Identify the Affected Component: Determine which component(s) are not working.
- Check the Relevant Fuse: Locate the fuse for that component in the fuse box diagram and check it.
- If the Fuse is Blown (and blows again):
- Visual Inspection of Wiring: Carefully inspect the wiring associated with the faulty component for signs of damage, such as frayed wires, insulation damage, or melted insulation. Look for wires that might be touching metal parts of the car (a common cause of short circuits).
- Check the Component Itself: The component itself might be faulty. For example, a malfunctioning headlight bulb could be the cause.
- Isolate the Problem: If you suspect a short circuit, you can try disconnecting the component temporarily to see if the fuse stops blowing. For example, if your power windows aren’t working and the fuse is blown, try disconnecting the power window motor (if you know how) and see if the fuse still blows. If it doesn’t, the motor might be the problem.
- Use a Multimeter (Voltage & Continuity Tests):
- Voltage Test: With the ignition on, check for voltage at the fuse slot (using the multimeter). If there’s no voltage, there’s a problem upstream in the circuit (e.g., a bad relay, a broken wire).
- Continuity Test: With the circuit de-energized (ignition off), use the continuity setting on your multimeter to check for continuity in the wiring. This can help you identify broken wires or shorts to ground.
- Consult a Professional: If you’re not comfortable working with electrical systems, or if you can’t diagnose the problem, consult a qualified mechanic.
Benefits of Understanding Your Car’s Fuses:
- Prevent Costly Repairs: Being able to identify and replace blown fuses can save you money on repair bills.
- Avoid Inconvenience: Knowing how to address basic electrical issues can prevent you from being stranded.
- Safety: Understanding fuses helps you maintain your car’s electrical system, which is crucial for safety.
- Early Problem Detection: Regularly checking your fuses can help you detect potential electrical problems before they become major issues.
- Empowerment: You gain a better understanding of your car and its systems.
Important Details and Tips:
- Always use the correct amperage rating: Never use a fuse with a higher rating than specified. This can lead to fire or damage to the electrical components.
- Carry spare fuses: Keep a supply of spare fuses (in various amperage ratings) in your car. This is especially helpful for long trips.
- Consult your owner’s manual: The owner’s manual is your primary resource for information about your car’s fuse boxes. It contains specific diagrams and instructions.
- Disconnect the battery: When working on electrical systems, especially if you’re unsure about what you’re doing, consider disconnecting the negative terminal of the battery for added safety.
- Don’t force anything: If a fuse doesn’t come out easily, don’t force it. Make sure you’re using the correct fuse puller and that you’ve identified the correct fuse.
- If you’re unsure, seek professional help: If you’re not comfortable working with electrical systems, don’t hesitate to consult a qualified mechanic. It’s always better to be safe than sorry.
- Record any modifications: If you add any aftermarket electrical components (e.g., a new stereo, additional lights), make sure you understand how they affect the car’s electrical system and the fuses involved. Make a note of any changes you make.
- Check Relays: Some circuits, especially those that handle higher current loads (like the headlights or the horn), use relays. Relays are electromechanical switches that are controlled by a small current, allowing a larger current to flow to the component. If a component isn’t working and the fuse is good, check the relay associated with that component. Relays often have a similar shape and size to fuses, and they can also fail. Consult your owner’s manual or a repair manual to find the location of the relays in your car.
Example Scenario: Power Window Failure
- Problem: Your driver’s side power window stops working. The other windows are still functioning.
- Action:
- Consult your owner’s manual to locate the fuse box and the fuse for the driver’s side power window.
- Inspect the fuse. If it’s blown, replace it with a new fuse of the correct amperage rating.
- If the new fuse blows immediately, this indicates a short circuit or a faulty component.
- Troubleshooting:
- Inspect the wiring near the driver’s side window motor for any damage.
- If you’re comfortable, disconnect the window motor and see if the new fuse still blows. If it doesn’t, the motor is likely the problem.
- If the fuse still blows with the motor disconnected, there’s a short circuit in the wiring. You’ll need to trace the wiring to find the source of the short (potentially a wire touching the car’s chassis).
- If you’re not comfortable with these steps, consult a mechanic.
Conclusion:
Understanding the fuse system in your Seat Leon III is crucial for maintaining your vehicle’s functionality and safety. This guide provides a comprehensive overview of fuses, their function, and how to troubleshoot common electrical problems. By following these guidelines, you can save money, avoid inconvenience, and keep your car running smoothly. Always prioritize safety and consult a qualified mechanic if you are not comfortable working with electrical systems. Remember, knowledge is power – and in the case of your car’s electrical system, it can save you time, money, and potentially even your life.
Seat Leon III Bezpieczniki Secrets: Don’t Blow a Fuse Before You See This! - FAQ
This FAQ section aims to answer your burning questions about the fuses in your Seat Leon III (2012-2020). We’ll cover everything from locating your fuse boxes to diagnosing and replacing blown fuses, so you can tackle electrical issues with confidence.
1. Where are the Fuse Boxes Located in my Seat Leon III?
- Answer: Your Seat Leon III typically has multiple fuse boxes. Here’s where you’ll likely find them:
- Main Fuse Box (Dashboard/Interior): This is usually located on the driver’s side, behind the dashboard, accessible by removing a small access panel. It’s often near the steering wheel or the driver’s side door.
- Auxiliary Fuse Box (Engine Compartment): This is located in the engine bay, usually near the battery or on the driver’s side. It’s covered by a plastic lid.
- Other Locations (Less Common): Some models might have additional fuse boxes in the passenger footwell, or even in the trunk/boot. Consult your owner’s manual for the exact locations for your specific model and trim. The owner’s manual is crucial for this!
2. How Do I Identify Which Fuse Corresponds to Which Component?
- Answer: This is where your owner’s manual becomes your best friend! Inside the manual, you’ll find a detailed fuse diagram. This diagram will show you:
- The location of each fuse in the fuse box (a numbered grid).
- The amperage (rating) of each fuse (e.g., 10A, 15A, 20A, etc.).
- The electrical component that each fuse protects (e.g., headlights, radio, power windows, etc.).
- Sometimes, the diagram will also include the fuse’s color code for quick identification.
- Important Note: Always use the fuse diagram specific to your year and model. Variations exist!
3. What Does it Mean When a Fuse is Blown?
- Answer: A blown fuse means the electrical circuit it protects has been overloaded. This can happen for several reasons:
- Overload: Too much current is flowing through the circuit, often due to a short circuit or a faulty component.
- Short Circuit: A wire has become exposed and is touching another wire or a ground connection, creating a direct path for current.
- Faulty Component: A component (e.g., a light bulb, a motor) has failed and is drawing excessive current.
- Incorrect Fuse: Using a fuse with a higher amperage rating than specified can prevent the fuse from blowing in an overload situation, but it can also damage the protected component and even cause a fire.
4. How Do I Know if a Fuse is Blown?
- Answer: Visually inspecting a fuse is the most common method. Here’s how:
- Remove the Fuse: Use a fuse puller (often included in the fuse box cover or a small plastic tool) to carefully remove the fuse from its slot.
- Examine the Filament: Look at the thin metal wire (filament) that runs across the inside of the fuse.
- Blown Fuse: The filament will be broken or melted.
- Good Fuse: The filament will be intact.
- Use a Multimeter (Optional): If you’re unsure, you can use a multimeter (set to continuity or resistance mode) to test the fuse. If the multimeter beeps or shows a low resistance reading, the fuse is good. If it shows “OL” or a very high resistance, the fuse is blown.
5. What Should I Do If a Fuse is Blown?
- Answer: Follow these steps:
- Identify the Affected Component: Determine which component is no longer working (e.g., headlights, radio, power windows). This helps you find the corresponding fuse in the fuse diagram.
- Locate the Fuse: Consult your owner’s manual to find the fuse diagram and locate the fuse for the faulty component.
- Remove the Blown Fuse: Use a fuse puller or small pliers to carefully remove the blown fuse.
- Inspect the Fuse (as described above): Confirm that the fuse is indeed blown.
- Replace the Fuse: Crucially, replace the blown fuse with a new fuse of the exact same amperage rating and type. Do not use a fuse with a higher rating! This could damage the electrical system or cause a fire.
- Test the Component: After replacing the fuse, test the component to see if it’s working again.
- Investigate the Cause (If the Fuse Blows Again): If the new fuse immediately blows, it indicates a more serious problem. You’ll need to investigate the cause:
- Check for short circuits: Inspect the wiring and the component itself for damage.
- Consult a professional: If you’re not comfortable troubleshooting electrical issues, take your car to a qualified mechanic or auto electrician.
6. Can I Use a Higher Amperage Fuse?
- Answer: No! Never use a fuse with a higher amperage rating than what is specified in your owner’s manual. Using a higher-rated fuse allows more current to flow through the circuit than it was designed to handle. This can lead to:
- Damage to the Component: The protected component (e.g., a motor) can be damaged by excessive current.
- Wiring Damage: The wiring can overheat and potentially melt, causing a fire hazard.
- Risk of Fire: Overloaded circuits can generate excessive heat, which can ignite flammable materials.
7. Can I Use a Lower Amperage Fuse?
- Answer: Generally, no. Using a lower amperage fuse might seem safer, but it can lead to:
- Frequent Blowing: The fuse might blow too easily, even under normal operating conditions, causing inconvenience and repeated replacements.
- Intermittent Operation: The component might work intermittently, as the fuse blows and is replaced.
- Not Solving the Underlying Problem: A lower-rated fuse won’t address the root cause of the problem, such as a short circuit or faulty component.
8. What if I Don’t Have a Replacement Fuse?
- Answer:
- Check Spare Fuses: Your Seat Leon III might have spare fuses included in the fuse box or a designated storage area. Check the fuse box cover or the owner’s manual for details.
- Temporary Solution (Use with Extreme Caution): In a pinch, and only to get you to a place where you can buy a replacement fuse, you could borrow a fuse of the same amperage from another non-critical circuit. For example, if your interior lights fuse blows, and you’re not using the interior lights, you could temporarily borrow the fuse for a short trip. Replace the borrowed fuse as soon as possible!
- Never Substitute: Never substitute a fuse with anything other than another fuse of the correct type and amperage rating. This includes things like wrapping the fuse terminals with foil or wire. This is extremely dangerous and can cause serious damage or a fire.
9. What are the Different Types of Fuses?
- Answer: Seat Leon IIIs typically use blade-type fuses. They come in various sizes, including:
- Mini Fuses: The smallest common type.
- Standard Fuses: The most common size.
- Maxi Fuses: Larger fuses often used for high-current circuits (e.g., starter motor).
- Low-Profile Mini Fuses: A smaller version of the mini fuse.
- Always match the fuse type to what’s specified in your owner’s manual.
10. My Lights Keep Flickering, Could it be a Fuse?
- Answer: Flickering lights can sometimes be caused by a blown or loose fuse, but it’s more likely to be caused by:
- Faulty Light Bulbs: The filament in the bulb is nearing the end of its life.
- Loose Connections: Corrosion or loose connections in the wiring or bulb socket.
- Faulty Relay: The relay controlling the lights could be failing.
- Voltage Regulator Issues: The car’s voltage regulator could be malfunctioning, leading to inconsistent voltage.
- Check the Fuse First: Always start by checking the fuse for the affected lights. If the fuse is fine, then investigate other potential causes.
11. My Radio/Infotainment System Stopped Working Suddenly. Is it a Fuse?
- Answer: Yes, it’s very likely to be a blown fuse! The radio/infotainment system has its own dedicated fuse. Consult your owner’s manual to find the fuse location and its amperage rating. If the fuse is blown, replace it with the correct one. If it blows again immediately, there might be a short circuit in the radio wiring or the radio unit itself.
12. How Can I Prevent Fuses from Blowing?
- Answer: Preventing fuses from blowing is mostly about proper maintenance and avoiding electrical abuse:
- Avoid Overloading Circuits: Don’t plug too many devices into a single cigarette lighter socket or power outlet.
- Inspect Wiring Regularly: Look for any damaged or frayed wiring, especially in areas exposed to the elements or mechanical stress.
- Address Electrical Problems Promptly: If you notice a component behaving strangely (e.g., flickering lights, slow operation), have it checked by a qualified mechanic.
- Use Quality Components: When replacing electrical components (e.g., light bulbs), use high-quality replacements.
- Professional Inspection: Consider having a qualified mechanic periodically inspect your car’s electrical system, especially if you suspect any issues.
13. I’m Not Comfortable Working with Electrical Components. What Should I Do?
- Answer: If you’re not comfortable working with electrical components, it’s always best to err on the side of caution and seek professional help. A qualified mechanic or auto electrician has the knowledge, tools, and experience to diagnose and repair electrical problems safely and effectively. Don’t risk damaging your car or causing a fire by attempting repairs you’re not qualified to perform.
14. Where Can I Buy Replacement Fuses?
- Answer: Replacement fuses are readily available at:
- Auto Parts Stores: (e.g., AutoZone, Advance Auto Parts, NAPA)
- Hardware Stores: (e.g., Home Depot, Lowe’s)
- Retail Stores: (e.g., Walmart, Target)
- Online Retailers: (e.g., Amazon)
- Dealerships: Your local Seat dealership will always have the correct fuses for your vehicle.
15. Why is My Car’s Battery Draining? Could it Be a Fuse?
- Answer: A draining battery can be caused by many factors, and a blown fuse is unlikely to be the primary culprit. However, a short circuit or a faulty component that’s drawing excessive current, which is protected by a fuse, could contribute to battery drain. Here’s a breakdown:
- More Likely Causes:
- Faulty Alternator: The alternator isn’t charging the battery properly.
- Parasitic Drain: An electrical component is drawing power even when the car is off. This is a common cause.
- Old Battery: The battery is simply worn out and can’t hold a charge.
- Fuse-Related Scenarios:
- Short Circuit: A short circuit in a circuit protected by a fuse can drain the battery.
- Faulty Component: A faulty component (e.g., a light, a relay) might be drawing power even when the car is off, leading to battery drain.
- Troubleshooting:
- Check the Fuses: Start by checking all the fuses, looking for any blown fuses. Replace any blown fuses with the correct amperage.
- Professional Diagnosis: If the battery continues to drain, you’ll need to have the car’s electrical system diagnosed by a qualified mechanic. They can perform tests to identify the source of the parasitic drain and other potential problems.
- More Likely Causes:
16. My Owner’s Manual is Missing. Where Can I Find the Fuse Diagram?
- Answer: If you’ve lost your owner’s manual, here’s how to find the fuse diagram:
- Online Resources:
- Search Online: Search online using the following terms: “Seat Leon III fuse box diagram [year]” or “Seat Leon III fuse diagram.” Make sure you specify your model year. You might find downloadable PDFs or images. Be very careful to ensure the diagram matches your exact model.
- Vehicle Forums: Check Seat Leon III owner forums or online communities. Other owners may have posted fuse diagrams or links to resources.
- Professional Help:
- Local Mechanic: A local mechanic might have access to the information you need.
- Dealership: The Seat dealership can provide you with a copy of the fuse diagram for your vehicle. They might charge a small fee.
- Caution: Always verify any online fuse diagram with the actual fuse box in your car before using it. Inaccurate information can lead to damage.
- Online Resources:
Important Disclaimer: This FAQ provides general information and should not be considered a substitute for professional advice. Always consult your owner’s manual and, if necessary, a qualified mechanic or auto electrician for specific guidance related to your Seat Leon III. Working with electricity can be dangerous. Always disconnect the negative battery terminal before working on your car’s electrical system.
Seat Leon III Bezpieczniki Secrets: Don’t Blow a Fuse Before You See This! - Conclusion and Summary
We’ve journeyed deep into the often-overlooked world of your Seat Leon III’s fuse box, uncovering the secrets to a smooth and stress-free driving experience. From understanding the importance of fuses to mastering the art of identification and replacement, this guide has equipped you with the knowledge to tackle common electrical gremlins and potentially save yourself a costly trip to the mechanic.
Recap of Key Points:
- Fuses: The Unsung Heroes: We highlighted the critical role fuses play in protecting your vehicle’s electrical components, preventing damage from overcurrents.
- Decoding the Fuse Box: We demystified the fuse box layout, explaining the different types of fuses, their amperage ratings, and how to locate them based on your car’s specific configuration (using your owner’s manual).
- Troubleshooting with Confidence: We provided a step-by-step guide to diagnosing electrical problems by checking fuses, recognizing blown fuses, and understanding the potential causes.
- Safe and Effective Replacement: We emphasized the importance of using the correct replacement fuses, following safety precautions, and the proper techniques for removing and installing them.
- Beyond the Basics: We touched upon advanced topics like identifying and resolving recurring fuse failures and the importance of consulting a professional for complex electrical issues.
Final Thoughts:
Armed with this knowledge, you are no longer a passive observer when it comes to your Seat Leon III’s electrical system. You’re now empowered to proactively maintain and troubleshoot your car, potentially saving time, money, and the frustration of unexpected breakdowns. This understanding fosters a greater appreciation for the intricate engineering that makes your car run and allows you to confidently address minor electrical issues.
Actionable Takeaways:
- Locate and Familiarize: Immediately locate your Seat Leon III’s fuse boxes (both interior and engine compartment) and take the time to familiarize yourself with the fuse layout diagram in your owner’s manual.
- Keep Spares Handy: Purchase a comprehensive fuse kit with various amperage ratings and keep it readily accessible in your car.
- Practice Makes Perfect: Don’t wait for a problem to arise! Practice identifying and replacing a fuse in a non-critical circuit to build confidence.
- Document and Observe: If you’re experiencing repeated fuse failures, meticulously document the affected circuit, the circumstances surrounding the failure, and any unusual symptoms. This information is invaluable for diagnosis.
- Prioritize Safety: Always disconnect the battery negative terminal before working on any electrical circuits, and never use a fuse with a higher amperage rating than specified.
Next Steps: Become Your Own Automotive Expert!
Now that you possess the foundational knowledge of your Seat Leon III’s fuse system, your journey of automotive self-reliance can continue! Explore other areas of your car’s maintenance and repair. Consider researching common electrical problems specific to your model. By investing a little time and effort, you can transform from a driver to a knowledgeable car owner, ready to tackle the challenges of the road with confidence. Don’t let electrical issues leave you stranded. Start by checking your fuse box today!
